Search the Community
Showing results for 'CustomCSS'.
-
In this topic , I try to share some css for you . For dear novices I will explain, you have this code in UniServerModule -- > CustomCSS Copy and assign the object to the CLS section in Layoutconfig when designing, or use this command when executing bitbtn1.JSCall('addCls', [' ...... ']); you can do if you like first, this sites can help to build css runtime https://htmlcheatsheet.com/css/
-
I have several settings that I save in my database such as font sizes, colors, etc. How could I give an update on "CustomCSS" because I realize that it is only loaded when creating the "TUniServerModule" Unit ServerModule; public { Public declarations } Procedure UpdateCSS; End; Procedure TUniServerModule.UpdateCSS; Begin With Self.customCSS Do Begin Add('.x-myfield-focus { '); Add(' border-color: #7eadd9; '); Add(' background-color: #FFFFE1; '); Add(' color: #FF0000; '); Add(' background-image: none; '); Add(' } '); End; End; //============================================================================================================ Unit Main; procedure TMainForm.UniFormCreate(Sender: TObject); begin UniServerModule.UpdateCSS; UniEdit2.JSInterface.JSConfig('focusCls', ['myfield-focus']); UniComboBox1.JSInterface.JSConfig('focusCls', ['myfield-focus']); end;
-
Change TUnimDatetime Calendar Icons
Alexandre Trevizoli replied to Alexandre Trevizoli's topic in uniGUI Mobile
After LONG try and error, I found how to solve this problem. If are you using Font Awesome 6, and added it on CustomFiles like this <link rel="stylesheet" href="files/fontawesome/css/all.css"> and have some Old Icons broken, use this on CustomCSS .x-font-icon { font-family: 'FontAwesome'; } This solve my issue. -
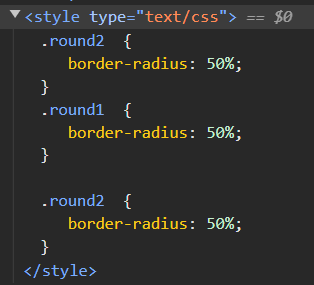
constructor TMainmForm.Create(AOwner: TComponent); begin inherited; with UniServerModule.CustomCSS do begin Add('.Round1 {'); Add(' border-radius: 50px;'); Add('}'); end; TUniLayoutConfig(Panel1.LayoutConfig).Cls:= 'Round1'; end; Not work!
-
I don't understand how this can help me. see I have appearance settings that I save in the database and I need to pass these settings to CustomCSS Can you change this attached example ? Modifed CustomCSS.7z
-
Good morning. I have two days trying to configure the customcss to be shown as I want. I have reviewed all the contributions to the CSS configuration forum of a Tunidbgrid component and I can't get it as I would like. I am using version 1.90.0.1567 of Unigui, Delphi 11 version 28.0.48361.3236. The maximum I have achieved is to show the unidbgrid in Zebra format using: .x-grid-item-Alt { Background-Color: #DFBF9F; } I am using the Triton-Modified theme and when I pass with the cursor on one of the items that are not even the line takes the default color of the theme, but when I pass on one of the item even the line does not change color. Looking on the Internet I have found this configuration that in principle adapts to what I want to do: / * General style for UNIDBGRID */ .STL-GRID { Font-Family: Arial, Sans-Serif; Border-Collapse: Collapse; Width: 100%; Margin: 10px 0; } / * Table header */ .stl-Grid Th { background-color: #8b5a2b; /* Dark brown */ Color: #FFF; / * Blank text */ Padding: 8px; Text-align: Left; } / * Even rows */ .STL-GRID TR: NTH-CHILD (EVEN) { Background-Color: #F2E5C1; /* Light brown */ } / * Odd rows */ .STL-GRID TR: NTH-CHILD (ODD) { Background-Color: #E5D0A4; / * Another tone of light brown */ } / * Normal cell */ .STL-GRID TD { Padding: 8px; } / * Highlighted cell (for example, when passing the cursor on it) */ .STL-GRID TD.HIGHLIGHT { Background-Color: #BF8040; / * Medium brown */ Color: #FFF; / * Blank text */ } / * Selected cell */ .STL-GRID TD.SELECTED { Background-Color: #A3662A; /* Dark brown */ Color: #FFF; / * Blank text */ } But even if it includes it in the Grid Cls, directly on the component or do so by uniframecreate with dbgrid.jsinterface.jsconfig ('CLS', ['Stl-Grid']); Only all the rows are shown in a color and when I move the cursor, nothing changes. Any help, please?
-
Any alternative ? There should be a way to re-inject the delayed customCSS.
-
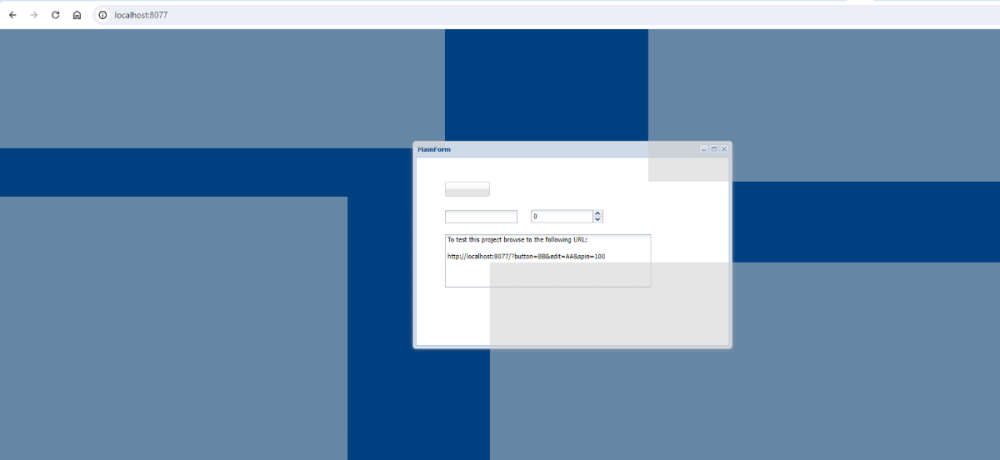
Hi guys, There has been a lot of conflicting information on the forum about whether uniGui can create PWA apps and how to go about turning your app into a PWA. I have done quite a bit of work with PWA’s and I am hoping that this post will clarify the issue and provide easy-to-follow guidelines for those who are interested. To make the process easier I have selected a simple demo app that comes with uniGui and uploaded it for you after converting it to PWA. You can use the url below to see the resulting PWA on any device. https://www.qssldtf.com:8086 The answer to whether uniGui is PWA capable depends very much on what aspect of PWA you are looking for. Clearly there is no doubt that any uniGui app can be made installable on all devices that support PWA technology. This includes all mobile devices as well as desktops running Chrome or MS Edge. Firefox & Opera support aspects of PWA but do not allow installation. And simply making your app installable makes such a massive a difference to ease of use (no browser, faster launch, full-screen, smooth navigation etc.) that there should be no excuse why you would not want to do it. How easily this can be done depends on the deployment option you have chosen. More to this below. The other aspects of PWA (offline operation, push notification & access to device resources) are, in my opinion, only achievable with uniGui if you build your UI with HTML and JavaScript because otherwise Ext JS puts too many stumbling blocks in the way. There are 3 basic requirements to making your app a PWA: The site must be accessed via HTTPS with a valid SSL certificate. The site must have a valid web Manifest You must supply and register a Service Worker HTTPS requirements PWA sites will only work over a secure connection with a valid SSL. However, for development purposes Google Chrome allows you to bypass this requirement when working over localhost so you can easily debug and install the PWA on your development device. This feature is not a default setting in Chrome. You need to enable it via chrome://flags as explained here Options for testing service workers via HTTP. Web Manifest The web manifest is a text file that contains a single JSON object whose fields map out the essential settings of your PWA site. By convention the manifest usually has the filename manifest.json or manifest.webmanifest and must reside in the root folder of your app. It contains all the information needed to tell the browser how the PWA will look when it is installed on the target device and configures how it will behave when it is launched. The manifest must also point to a list of icons of varying sizes to be used on splash-screens of devices you are targeting. There is a wealth of information about the web manifest online so I won’t say anymore here, except to mention that this is where there is a stumbling block with uniGui, unless you are deploying via ISAPI. As many developers have discovered, it is impossible to import the manifest if your app is running in standalone mode, with or without hyper-server. You will consistently get the dreaded “401 (unauthorised)” error. However I managed to come up with a means to sneak the manifest in through the back-door and I will share that below. Service Worker The Service Worker is a piece of JavaScript code that runs in its own thread in the browser background and intercepts and routes all the communication between the client side of your app and both the server and the rest of the world. You have tools to interrogate and manipulate this communication at will with JavaScript. You can immediately see how things like “working offline” and “push notifications” evolve from this. Every PWA running in the browser must register its own service worker. By convention the service worker has a filename like sw.js and usually reside in the root folder of your app. Depending on the desired functionality the service worker can be very complex or a simple stub that just relays messages without any interrogation. The service worker included in the demo project I have uploaded with this post is of the latter type and you can safely use it in all your apps. However, every service worker must have a unique “cache-name” so you need to edit the file and change the embedded cache-name to something that matches your app-name. What is with Safari At the point of this writing Safari does not yet support the web manifest. When you run you PWA on any Safari device the manifest is completely ignored. Instead, in order to get a PWA to work Safari requires that you insert some essential meta tags into the header of your html. It so happens that this anomaly with Safari makes it much easier to convert a uniGui app installable on Apple devices. Just give the app the little stub of service worker discussed above and add a tiny bit of JavaScript into the ServerModule.CustomCSS to activate it then add the following meta tags and into the ServerModule.CustomMeta and you have a working PWA for all Safari Devices. Gone is the “401 (unauthorised)” nightmare. <meta name="apple-mobile-web-app-capable" content="yes"> <meta name="apple-mobile-web-app-status-bar-style" content="black"> <meta name="apple-mobile-web-title" content="Video Demo"> <meta name="apple-touch-icon" href="/files/icons/i144x144.png" sizes="144x144"> <meta name="apple-touch-icon" href="files/icons/i192x192.png" sizes="192x192"/> <meta name="apple-touch-icon" href="files/icons/i152x152.png" sizes="152x152"/> I continue to see recent articles online that tell you that in order to get your PWA to also work on Safari you have to insert these meta tags into your app. This is old news guys. This Safari issue was made redundant in April 2020 when Google introduced PWACompat. This utility will look at your web manifest and automatically adjust the html of your app to satisfy Safari (and other legacy browsers). We’ll see how to use it below. So how do you go about converting you uniGui to PWA The components and bit of code you need are included in the project I have supplied so I suggest you start by downloading and compiling the project to get to grip with how things work. The project is very simple and should compile without any issues. Note that I have configured the project to store the resulting exe and dcu’s in their own folders because I prefer to keep the source folder uncluttered. After compiling, run the app by double-clicking on the resulting exe then use Chrome to access http://localhost:8077. Don’t forget to configure Chrome to bypass HTTPS requirements as stated above beforehand. Once the site has opened I suggest you activate Chrome’s dev-tools (F12 key) and switch to the “application” tab. There you can see that both the service worker and manifest have installed successfully and all the icons will be shown. You should now also see an install button in the toolbar. Depending your version of Chrome, you might have to close and restart the site if you don’t see the install button. Go ahead and run the install, it is very easy to uninstall later. The PWA should install immediately and switch over to a full-screen standalone application and the app icon should appear on your desktop. By the way, the easiest way to uninstall a PWA is to go to chrome://apps. All installed PWA’s will be shown and you can right-click to select the uninstall option. It might interest you to know that the PWA will also be registered as a valid Windows application in the Registry. So you can uninstall it by going to “Control Panel -> Programs & Features”. Lets’ analyse the PWA components in the demo project In the root folder of the executable you can see the following required files: manifest.json sw.js (Service Worker) We also have a list of splash-screen icons stored in the folder files/icons. That is in general all you need from a components point of view. In theory all you then need to do now is to import the manifest and register the service worker when the project starts up. Importing the manifest You do this by inserting this into ServerModule.CustomMeta: <link rel="manifest" href="/manifest.json"> Registering the Service Worker This is done with the bit of JavaScript shown below. You insert this into ServerModule.CustomCSS. As you can see, it is good practice to first check whether the host browser supports service workers before attempting to register. In the script I have supplied with the demo project I have inserted some logging (console.log) to show weather or not registration has succeeded. You can see the results in the “console” page of the dev-tools. You need to comment the log statements out before publishing your PWA app. </style> <script> if ('serviceWorker' in navigator) { navigator.serviceWorker.register('/sw.js') } </script> <style> If you are deploying through ISAPI that is all you need to do. The site will work as a PWA in Android and Chrome. But not Safari. In order for Safari to work you need bring in the PWACompact utility discussed above. You do this by adding the pwacompat link in the ServerModule.CustomMeta entry, before the manifest link. So the CustomMeta entry will look like this (note I included the favicon injection that we all do): <link rel="icon" type="image/png" href="files/icons/i192x192.png" sizes="192x192"/> <meta name="apple-mobile-web-app-capable" content="yes"> <script async src="https://cdn.jsdelivr.net/npm/pwacompat" crossorigin="anonymous"></script> <link rel="SHORTCUT ICON" href="/favicon.ico"> <link rel="manifest" href="/manifest.json"> Briefly, the PWACompat utility will analyse your manifest and insert additional meta links to satisfy Safari. You will them have a PWA that will work in all PWA compatible browsers. But, as things stand, this will only work when deployed through ISAPI. If you are running in standalone mode the “manifest” link will fail with a “401 (unauthorized)” error and PWACompat will fail because it does not have a manifest to work with. To fix this issue I borrowed an idea from here How to Setup Your Web App Manifest Dynamically Using Javascript and adjusted it to overcome some ExtJS quirks. The trick here is to remove href="/manifest.json" from the manifest link in the CustomMeta script and replace it with a placeholder id that we can use later to inject a dynamic manifest. The manifest meta link now looks like this: <link rel="manifest" id="manifest_link"> What I did for standalone deployment is to read the manifest in Delphi and generate some JavaScript that will be injected into the starting html. The resulting JavaScript must be inserted into the “Script” field of the form that activates first. If your application uses a Login form the script should will be inserted the LoginForm is activated, otherwise it has to be inserted into the MainForm. The project demo I have supplied does not have a Login form so the script is inserted as follows in the Main form: procedure TUniLoginForm1.UniLoginFormCreate(Sender: TObject); var sManifest : String; begin sManifest := UniMainModule.GetDynamicManifest; if sManifest > '' then Self.Script.Text := sManifest; end; As the code indicates I have placed the required JavaScript generation code in the MainModule for ease of use. The UniModule.GetDynamicManifest function converts the contents of the manifest.json file into a JavaScript object and add the necessary java code that will modify the manifest link we added via CustomMeta (<link rel="manifest" id="manifest_link">) and insert an “href” that points to the new manifest object. You will notice when you look at the manifest generation function that it first checks the manifest.json to make sure that it contains all the essential fields. I discovered by accident that Delphi’s JSON handling does not have decent exception handling and there is no way of avoiding a crash if you try to reference a field that does not exist. If your manifest.json does not conform you will get an empty JavaScript back and the PWA won’t work. In case you want to see the resulting JavaScript I have added some code in the function to save it in the folder Config off the root folder. You just need to un-comment it. Additionally, it is a habit of mine to use the ini file concept to configure my applications. This is what I have done regarding the CustomMeta and CustomCSS scripts. I store the changes I need in an external text file and import it at start-up. For this project I have stored the data in the folder “Config" within the root folder. This is the code I use to populate the ServerModule: procedure TUniServerModule.UniGUIServerModuleCreate(Sender: TObject); var sData, cfgFolder, cfgFile : String; begin cfgFolder := ServerRoot+'config\'; //Import service worker registration cfgFile := cfgFolder + 'script.cfg'; if FileExists(cfgFile) then with TStringList.Create do try LoadFromFile(cfgFile); sData := Text; if sData > '' then CustomCSS.Text := sData; finally free; end; //Import manifest meta links cfgFile := cfgFolder + 'meta.cfg'; if FileExists(cfgFile) then with TStringList.Create do try LoadFromFile(cfgFile); sData := Text; if sData > '' then CustomMeta.Text := sData; finally free; end; end; To summarise, these are the steps you need to do to convert an existing uniGui app to PWA: Create a web manifest.json and place it in the root folder of your executable. I suggest you initially copy my manifest and change the “name”, “short_name” and start_url to fit your project. For standalone deployment the start_url should point to the project executable if you are not using the hyper-server, otherwise it should point to hyper_server.exe. For ISAPI it should point at the hyper-server dll, whatever you have called it. 2 quick tips here: The “name” in the manifest is used on the splash screen of mobiles and the caption of the MainForm when running on desktops. However what you have entered in the “name” field will be concatenated with whatever you have in the “Title” field of the ServerModule. So remember to blank the ServerModule’s Title field. FYI the “short_name” will be used on the home-screen icon of mobiles and shortcut icon of desktops, but only if the “name” is too long (I think >40 chars). There are numerous online tools to help you create your icons. I use https://manifest-gen.netlify.app. You just need to upload a 512x512 image and it will generate all the icons you require. Copy my sw.js into the executable root folder. Copy the contents of my files/config folder into the files folder of your executable. Copy the CustomMeta & CustomCSS importing code from my project into your ServerModule. If you are using standalone deployment copy the dynamic manifest generation function from my project into your MainModule and insert the scrip-handling calls in your LoginForm or MainForm. Something to be aware of regarding installing you PWA’s on your test device: Chrome uses the URL as a unique identifier for each PWA. So once you have installed an app running on https://localhost:8077 you won’t be able to install another app running on the same port. So you have to either un-install the previous one or use a different port. That’s it guys. I hope this post generates a bit of renewed enthusiasm. PWA-VideoDemo.zip
- 17 replies
-
- 13
-

-

-
- pwa
- web manifest
-
(and 1 more)
Tagged with:
-
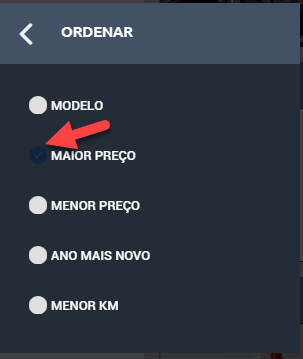
Searching the forum I found some examples to use in RadioGroup, what I couldn't do is change the color of the radiobutton when it is selected (see image). customcss: .meuRadioGroup { background: rgb(36, 44, 55); border: none; padding: 10px; } .meuRadioGroup input[type="radio"]:checked + label::before { background-color: coral; } function beforeInit(sender, config) { config.fieldDefaults = { style: 'padding: 5px; height: 50px;' } }
-
Hello, I am presenting the following problem: I have some CSS classes in the customCSS property of the server module. In a control of type TUniHTMLFrame I try to create some tags of type "div" at run time. What happens is that on Windows everything works fine, but when I deploy the application to Linux, the CSS is not applied. I understand that Linux is a bit different, but the strange thing is that the CSS classes are in the customCSS property of the server module, that's why my doubt. this is the code: with panelComentarios do begin html.Add('<div class="time">'); html.Add( lowercase(fieldbyName('nombre').AsString)+lowercase(fieldbyName('apellido1').AsString) ); html.Add(DateTimeToStr(fieldbyName('fecha').AsDateTime) ); html.Add('</div>'); html.Add('<div class="message">'); html.Add(fieldbyName('descripcion').AsString); html.Add('</div>'); end; Thanks
-
work.. if code with servermodule.create and mainmodule.create. not work (round3) if code with mainm.create. How to customize css in form at run-time ? (Update MainPain CSS at run-time) it work only refresh browser again. (After add CSS to ServerModule.CustomCSS>>work only new MainPage) runtimeCSS.zip
-
Try this: constructor TMainForm.Create(AOwner: TComponent); begin inherited; with UniServerModule.CustomCSS do begin Add('.round1 .x-panel-body {'); Add(' border-radius: 50px;'); Add('}'); end; TUniLayoutConfig(UniPanel1.LayoutConfig).Cls:= 'round1'; end;
-
These codes work. But this is not a fact that your CustomCSS will work correctly.
-
Ok. Try simply use this solution for now: CustomCSS -> .x-textareafield textarea { line-height: normal !important; }
-
Try this customCSS, here we double the font size, default 16px: UniServerModule.CustomCSS -> .x-calendar-event .x-calendar-event-resizer:after { font-size: 32px; font-family: monospace; content: "="; }
-
Hello, how are you guys? How do I define a CustomCSS in UniDBGrid.HeaderTitle. I was able to do it in the rest of the UniDBGrid, but the HeaderTitle property does not apply, how could I do it ??
- 3 replies
-
- headertitle
- unidbgrid.headertitle
-
(and 3 more)
Tagged with:
-
Yes, I'm using CustomCSS like this .magazzini_menu_icon{ background-image:url(files/images/warehouse.svg); background-repeat: no-repeat; } .filter-color{ filter: invert(100%) sepia(100%) saturate(0%) hue-rotate(298deg) brightness(102%) contrast(102%); } .eye_button{ padding: 0px 0px 4px 0px; background-image:url(files/images/button/eye-solid.svg); background-origin: content-box; } .eye_slash_button{ padding: 0px 0px 4px 0px; background-image:url(files/images/button/eye-slash-solid.svg); background-origin: content-box; }
-
Are runtime packages and theme packages installed correctly? Try reinstalling. Perhaps you are also using CustomCSS?
-
UX used to provide a spotlight around a specified component/element. 1. MainForm.Script -> var spotlight = Ext.create('Ext.ux.Spotlight', { easing: 'easeOut', duration: 500 }); spotlight.hideAndInactive = function() { this.hide(); this.active = false; }; 2. CustomCSS -> .x-spotlight { background-color: #ccc; z-index: 99999; position: absolute; top: 0; left: 0; -moz-opacity: 0.5; opacity: .50; filter: alpha(opacity=50); width: 0; height: 0; zoom: 1; font-size: 0; } 3. Initialization -> initialization UniAddCSSLibrary('build/packages/ux/classic/classic/resources/ux-all.css', False, [upoFolderJS, upoPlatformDesktop]); UniAddJSLibrary('build/packages/ux/classic/ux.js', False, [upoFolderJS, upoPlatformDesktop]); Simple usage -> Show: procedure TMainForm.UniButton1Click(Sender: TObject); begin JSInterface.JSCallGlobal('spotlight.show', [UniEdit1.JSId]); end; Hide: procedure TMainForm.UniEdit1Click(Sender: TObject); begin JSInterface.JSCallGlobal('spotlight.hideAndInactive', []); end;
-
line-height: 100%; CustomCSS -> .x-column-header-text-wrapper { line-height: normal; }
-
Also at runtime. 1. CustomCSS -> .x-column-header-text-wrapper { line-height: 100%; } 2. Usage: procedure TMainForm.UniButton1Click(Sender: TObject); var CalculatedHeight: SmallInt; begin CalculatedHeight := 100; // You can calculate the max value yourself... with UniDBGrid1.JSInterface do JSCall('headerCt.setConfig', [JSObject(['maxHeight', CalculatedHeight, 'height', CalculatedHeight])]); end;
-
If I understood correctly, try this solution (not for multi-level columns). 1. CustomCSS -> .x-column-header-text-wrapper { line-height: 100%; } 2. MainForm.OnCreate -> procedure TMainForm.UniFormCreate(Sender: TObject); begin UniDBGrid1.JSInterface.JSAddListener( 'reconfigure', 'function(grid, store, columns){'+ 'Ext.defer(function() {'+ ' var columns = grid.getColumnManager().getColumns();'+ ' var maxHeight = 0;'+ ' for (let i = 0; i < columns.length; i++) { '+ ' if (parseInt(columns[i].titleEl.getStyle("font-size"))> maxHeight) {'+ ' maxHeight = parseInt(columns[i].titleEl.getStyle("font-size"))'+ ' }'+ ' }'+ ' if (maxHeight != 0) {'+ ' grid.headerCt.setConfig({maxHeight: maxHeight + 10});'+ ' grid.updateLayout();'+ ' }'+ '}, 10)'+ '}' ) end;
-
I am using latest version. This may be a know issue, I used the CustomCSS to change the TITLE HEIGHT. You can see near the top, i have x.-toolbar .-title and changed the size to 36pt. But yet when i run inside chrome on my laptop with the /M it shows with the nice LARGER font. BUT when I run it inside chrome on my cellphone, it remains SMALL font. You can see this from my 2 screenshots. .x-checkboxfield .x-input-el { opacity: 10; } .x-toolbar .x-title { font-weight: bold; font-size: 36pt;} .customGlyph32 .x-icon-el { width: 32px !important; height: 32px !important; } .customGlyph24 .x-icon-el { width: 24px !important; height: 24px !important; } .CustomAlignMobile .x-inner-el { line-height: normal; padding-top: 0 !important; } .x-mask-msg div{ font-family: Ubuntu, Arial, sans-serif; font-size: 24px; } .MyTitle .x-panel-header-default-horizontal { height: 11px; padding: 0px 10px 0px 10px; } .x-grid-row-selected .x-grid-cell-inner { font-weight: bold; color: rgb(255,0,0); background-color:green; } .myStyle1 { background-color: rgb(0,255,255) !important; border-radius: 25px 25px 25px 25px; -moz-border-radius: 25px 25px 25px 25px; -webkit-border-radius: 25px 25px 25px 25px; color: rgb(0,0,255); border: 1px solid #1a26d4; } .DBG1 .x-grid-row-selected .x-grid-cell-inner { background-color:green!important; } .DBG2 .x-grid-item-selected .x-grid-cell { font-weight: bold!important; background-color:blue!important; } .x-grid-row-selected2 .x-grid-cell-inner { font-weight: bold!important; background-color:green!important; } .addGreenPanel .x-panel-body-default { background: rgb(0,128,0); } .addLightGreenPanel .x-panel-body-default { background: rgb(161, 239, 161); } .addRedPanel .x-panel-body-default { background: rgb(240,96,96); } .addLightRedPanel .x-panel-body-default { background: rgb(240,180,180); } .addYellowishDarkerBG .x-form-text{ background-color: rgb(208,208,128)!important; background-image: none; } .addYellowishDarkerBG_2{ background-color: rgb(208,208,128)!important; background-image: none; } .addYellowishBG .x-form-text { background-color: rgb(252,252,176)!important; background-image: none; } .addYellowishBG_2{ background-color: rgb(252,252,176)!important; background-image: none; } .addYellowBG .x-form-text{ background-color: yellow!important; background-image: none; } .addYellowBG_2{ background-color: yellow!important; background-image: none; } .addRedBG .x-form-text { background-color: rgb(255,200,200)!important; background-image: none; } .addRedBG_2{ background-color: rgb(255,200,200)!important; background-image: none; } .addFFFFFFBG{ background-color: rgb(255,255,255)!important; background-image: none; } .addE8E8E8BG{ background-color: rgb(232,232,232)!important; background-image: none; } .add000000Font{ color: rgb(0,0,0)!important; background-image: none; } .addBlackForceFont{ color: rgb(0,0,0)!important; background-image: none; } .addGrayForceFont{ color: rgb(0,0,0)!important; background-image: none; } .add606060Font{ color: rgb(96,96,96)!important; background-image: none; } .addBlackFont{ color: rgb(0,0,0)!important; background-image: none; } .MyStyleW .x-form-text{ color:red!important; height:8px; font-size: 24px; background-color:yellow!important; background-image:none; } .QQQQQQQMyStyleW{ color:red!important; height:8px; font-size: 24px; background-color:yellow!important; background-image:none; } I find it odd that the desktop chrome displayed the title nice and big, while the mobile chrome displayed the title tiny. Davie Screenshot_Chrome_Mobile.bmp Screenshot_Chrome_Desktop.bmp
-
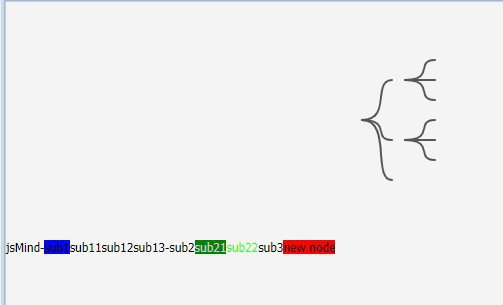
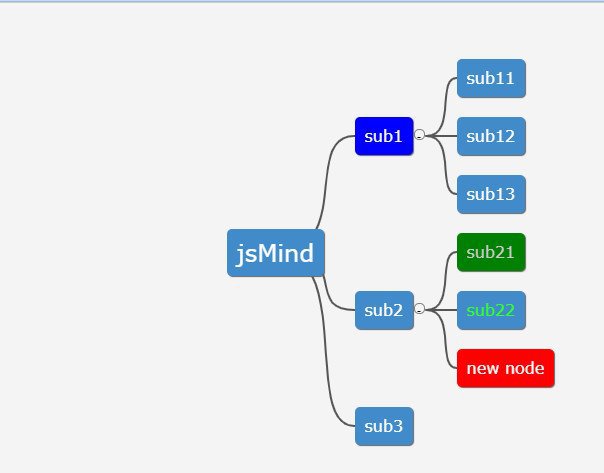
I call "jsmind.css" to setup my page,but I find that: if I call the code from UniServerModule->CustomCss (files\jsmind-master\style\jsmind.css), The page comes out abnormal. If I call some code to UniHTMLFrame->HTML,the page is normal. UniHTMLFrame1->HTML->Add("<!doctype html>") ; UniHTMLFrame1->HTML->Add("<html>") ; UniHTMLFrame1->HTML->Add("<head>") ; UniHTMLFrame1->HTML->Add(" <meta charset=\"utf-8\">") ; UniHTMLFrame1->HTML->Add(" <meta http-equiv=\"Content-Type\" content=\"text/html\"; charset=\"utf-8\">") ; UniHTMLFrame1->HTML->Add(" <title>我的年度计划思维导图</title>") ; UniHTMLFrame1->HTML->Add(" <link type=\"text/css\" rel=\"stylesheet\" href=\"files/jsmind-master/style/jsmind.css\" />") ; UniHTMLFrame1->HTML->Add(" <style type=\"text/css\">") ; UniHTMLFrame1->HTML->Add(" #jsmind_container{") ; UniHTMLFrame1->HTML->Add(" width:800px;") ; UniHTMLFrame1->HTML->Add(" height:500px;") ; UniHTMLFrame1->HTML->Add(" border:solid 1px #ccc;") ; UniHTMLFrame1->HTML->Add(" background:#f4f4f4;") ; UniHTMLFrame1->HTML->Add(" }") ; UniHTMLFrame1->HTML->Add(" </style>") ; UniHTMLFrame1->HTML->Add("</head>") ; My question is : what is the priority between UniHTMLFrame->HTML and UniServerModule->CustomCss ?
-
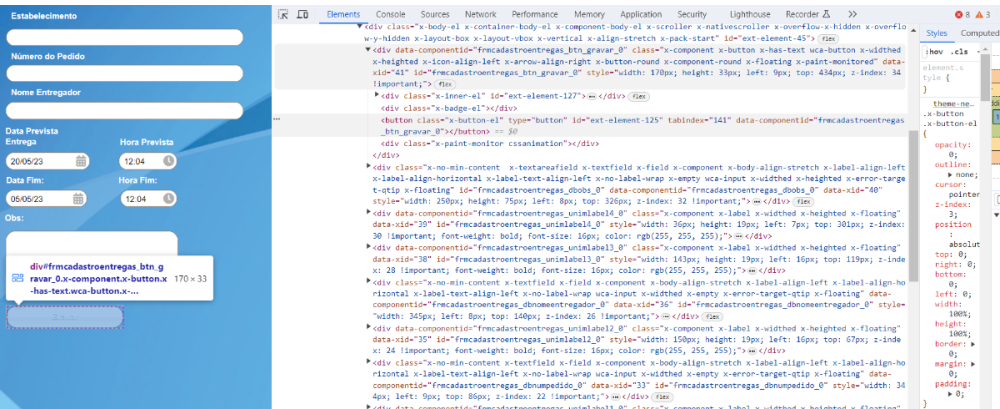
Unigui version - 1.95.0.1576 Need help to change style of TunimButton I put CSS on CustomCSS .wca-button { box-shadow:inset 0px 1px 0px 0px #54a3f7 !important; background:linear-gradient(to bottom, #007dc1 5%, #0061a7 100%) !important; background-color:#007dc1 !important; border-radius:15px !important; border:1px solid #124d77 !important; color:#ffffff !important; font-size:13px !important; text-decoration:none !important; text-shadow:0px 1px 0px #154682 !important; } .wca-button:hover { background:linear-gradient(to bottom, #0061a7 5%, #007dc1 100%) !important; background-color:#0061a7 !important; } config Layout Css and add ExtEvents function added(sender, container, index, eOpts) { sender.addCls('wca-button'); } function painted(sender, eOpts) { sender.addCls('wca-button'); } nothing works. Need help to understand what I'm doing wrong. Thanks!


