Leaderboard


Popular Content
Showing content with the highest reputation since 04/23/23 in all areas
-
Completely unnecessary this question about the future of Unigui If the Unigui team doesn't create anything new and just improve what already exists, giving more stability bug fixes it's already great everything we need in terms of components we have with Unigui For me Unigui is perfect. I managed to migrate all my ERP of 520.000 thousand lines of code to Unigui Instead of complaining let's help the team by always renewing our licenses. Hug to everyone.7 points
-
I compiled all above in program wich create a Self Signed Certificate in 3 secondes. Best Regards... See the updated program here : http://forums.unigui.com/index.php?/topic/18951-help-with-ssl-intranet/&do=findComment&comment=141667 Prg.7z7 points
-
Dears, You have chosen to be a developer. For what ? the answer is simple: It's because you love everything that is: - Beautiful - TRUE - and Fair it makes you lights in this dark world. but...you are forgetting something very important: your health. guys, we develop too much, we stay too long in front of our screens and we end up with hypertension, heart palpitations, loss of visual acuity, and other nasty syndromes... I wanted to launch this alert, because I myself am concerned. Fortunately, there is a solution: Do SPORT and drink lots of water. it's funny, isn't it! try it and you will see: it will be beneficial for you and your family and moreover, you will develop twice as fast. Have a good day6 points
-
Dears, I was finally able to do something: If one day, you will have to develop an Unigui app: - Under local network, - Without Internet, - Which requires an SSL (example Scann Camera) Then read the following: I thought, wrongly to create "Self Signed Certificate". Today, most of browsers reject them. So, after 3 days search, I understood that it was necessary to use another technic : Create a localhost Certificate by mkcert This is inspired by (thx to the Author) : https://technixleo.com/create-locally-trusted-ssl-certificates-with-mkcert-on-windows OK...Step by Step : 1. Installing mkcert on Windows 1.1 mkcert can be installed by Chocolatey To install Chocolatey, you must first ensure the Policy AllSigned Open PowerShell as Admin Get-ExecutionPolicy if Restricted then : Set-ExecutionPolicy AllSigned 1.2 To install Chocolatey see https://chocolatey.org/install In PowerSehlle type (in a single line): Set-ExecutionPolicy Bypass -Scope Process -Force; [System.Net.ServicePointManager]::SecurityProtocol = [System.Net.ServicePointManager]::SecurityProtocol -bor 3072; iex((New-Object System.Net.WebClient).DownloadString('https://community.chocolatey.org/install.ps1')) 1.3 install mkcert In PowerSehlle type: choco install mkcert The mkCert Directory (by default) is: C:\Users\...\AppData\Local\mkcert 2. Generate my 2 pem files In PowerSehlle type: mkcert -install This will generate 2 files in C:\Users\...\AppData\Local\mkcert: rootCA.pem rootCA-key.pem 3. Generate a localhost.p12 Certificate In PowerSehlle type: mkcert -pkcs12 localhost This will generate localhost.p12 certificate which will be in the PowerShell directory, ie: ..\System32 4. Import the localhost Certificate Touche Win + R key: mmc File > Add > Certificates > Add Computer account local computer OK Right click / on WEB Hosting Certificates > All Tasks Machine Room Select localhost.p12 Certificate Next specify the password (default): changeit Check: Key Exportable Place of the Certificate on : Web Hosting (dépend on your windows langage : example for french : Hébergement Web) This will create 2 Certificates (in Web Hosting): - localhost - mkcert myDESKTOP-xxx 5. Project Unigui Requires 3 files: cert.pem key.pem root.pem Do not use root.pem = rootCA.pem ( C:\Users\...\AppData\Local\mkcert ) key.pem = rootCA-key.pem ( C:\Users\...\AppData\Local\mkcert ) wich are generated by mkcert. Use instead the new 3 files, obtained online (by converting the p12 file in a new global pem file) 5.1 Split localhost.p12 into 3 Files You can obtain the 3 files via a conversion of the Certificate: localhost.p12 Use Online: https://www.sslshopper.com/ssl-converter.html - Upload the Certificate File: localhost.p12 - indicate the type: PFX/PCKC#12 - Convert To: Standard PEM - Password: changeit You will get global File, containing 3 blocks : start ...end Separate them with Notebook, and save them into 3 files: The first = cert.pem The second = root.pem The third = key.pem 5.2 Compile your project and run it : https://localhost:8077/ is Secure Have fun... ___________________ PS: if you are interesting by an easy way to scan BareCode via your Android device (wich requires an SSL url) you can use Falcon Store - Components Delphi from our Friend Marlon. Very fast and light ! http://forums.unigui.com/index.php?/topic/11359-falcon-store-components-delphi-httpsstorefalconsistemascombr/#comment-602606 points
-
News https://store.falconsistemas.com.br Added 4 additional months of subscription for all components for all users. From now on all components have 1 year for fixes, new components and improvements for all users 🚀🚀🚀.5 points
-
uniGUI Floating Buttons (simple but useful) This is a very simple project that shows how to use floating buttons anchored to the main browser window or your form. I already left the JS code calling ajaxrequest to select the correct buttons for your UI. So, just choose the icons, the best model and see in the CSS where you change it to leave it in one format or another. I already commented on where to change the CSS code. project411-floatingbutton.rar FloatingButtons2.mp4 FloatingButtons.mp45 points
-
uniGUI/VCL Face Recognition based on Luxand FaceSDK library.Recognition/Face Features/Expressions and more.. Projects For Sale Download Demos With examples ported/adapted and updated to Delphi VCL and uniGUI. Brief Introduction Luxand is one of the oldest and well tailored libs for facial recognition for different programming languages and development environments (Windows, Web (python and .net), Android and iOS). Since 2010, I have been following this material and used it for several simpler projects and tests, just curiosity. It has evolved a lot over the years, going from just a simple comparison of images to very sophisticated things like easy recognition in a video feed, real-time tracking of people in a video feed, facial expressions, facial features and much more. However, its best examples were never properly adapted to Delphi/Pascal after the String/Ansi/unicode changes introduced in version 2010 onwards. Even the examples you can download today from the official website will not work correctly or will have pascal code primitive errors. You can test it ! Some of them won't even work for Delphi/Pascal at all. Despite being a very cheap and practical lib, they now seem to only focus on their online Cloud API service and, in the last version, they didn't even update or make exampled for Delphi/Pascal. So you will find new examples for other languages but not for Delphi/Pascal since 2010 in their own package. I spent weeks studying and correcting the examples shown here and adapting them when possible to uniGUI and code to Pascal. All the basic functions of the lib I managed to adapt to VCL and uniGUI completely. The examples prove this! Watch the video demos. I highly recommend this lib for facial recognition and many other features it has. Even more so, it is the only one that does not require an hardcore dedicated video card or suffer from the slowdowns that OpenCV has. Features and Characteristics Detects Age, Gender, Facial expressions such as smile, closed eyes, angle of the face in relation to the photo. Detects facial elements such as eyes, mouth, entire face, face position, face angle in relation to the photo plane. Easily detects and identifies multiple faces in the same image with all the elements described above (see Face_SDK Mega demo). Detects people (up to 256 on-the-fly) in a video feed (webcam or IPCam), with support for identification tracking (See the LiveRecognition demo). Detects people in live video feed and their elements such as Age, Gender, Facial expression etc. (for unigui too) see example uniGUIFaceDetectionCircle. Compare images by template (one image in relation to another) or group of images against one. Good for security authorization/access walls. See LookAlike Example.ce Command example show how to integrate with a lot os commands. Easy to modify and adapt to your needs No third party components. All fonts included for Delphi/Pascal. No hidden costs or fees. Yes, we offer advice on adapting any of these examples to your systems. Contact us to receive a quote. Try before buy it 1- Download functional Demos Examples List of Examples with Source Code Adapted/Updated by me for Delphi/uniGUI: -AgeGenderRecognition - VCL - Find Age and Gender on Live feed from Webcam and subtitle on-the-fly the subject (the person detected) with that information. -ExpressionRecognition - VCL - Find if subject is Smiling and its age on Live Feed from Webcam -FaceSDK- VCL - Detects Face(s), Extracts Face and Facial Features, Face Expressions (smile, Eyes Open), Age and Gender from image, One Face only (the first detect) or Muultiple Faces (ALL detected in a image). Extract faces to files. This is a mega demo with all the basics image features I made. You don't have this in the original package. See demo video ou download demo package. You can adapt this to uniGUI easy. This code is completly compatible with uniGUI since is just replace all components. -FaceTracking - VCL - Tracking face from a Live feed from Webcam (plot rectangle over face) -FacialFeatures - VCL - Plot face features from an image (face, eyes, mouth, eyes etc) -LiveFacialFeatures - VCL Tracking face from a Live feed from Webcam (plot retangle over face and face elements: face, eyes, mouth etc) Live Recognition from feed LiveRecognition - VCL - Tracking face from a Live feed from Webcam , identify subjects and add to tracket table to future track. Support 256 face tracking and identificiation at the same time. IPCamera - VCL - Tracking face from a Live feed from Webcam , identify subjects and add to tracket table to future track. Support 256 face tracking and identificiation at the same time. uniGUIFaceDetection - uniGUI - MegaDemo for uniGUI: Tracking face from a Live feed from Webcam. Upon face detection, Get elements, facial expression and facial features with discritive text (gender, age, facial expression etc). This is a mega demos I made to unigui with all basic features. 2- Video Samples Live Feed Face Recognition with ID track (aka name of subject) Live Feed Face Expressions Live Feed Face Reecognition Gender, Age and Facial Expressions detection Photo LookAlike (batch)4 points
-
uniGUI - Module Notification This notification lib is different since it injects the notification inside a module container. So, is perfect for a non intrusive like dashboards and works perfectly with native uniGUI controls. Module-Noty.mp4 Download project below. Only for uniGUI subscribers. Project19-ModuleNotification.rar4 points
-
Hello this is my solution for my customers to change the colors - it works in your existing unigui-application. If you will used it -and make it better 😉 - please post your work here HowTo: Please set Theme "triton.modified" in UniMainModule you need public vars in UniMainModule: my_text_under_highlite, texthintergrund, texthintergrund_focus, my_color, hintergrundfarbe, randfarbe, textfarbe : String; you need a hidden "UniHTMLFrame2" in Mainform ..and the Form in the zip 😉 unigui_UI.webm colors.zip4 points
-
I have the same opinion. nothing is perfect but out of all the frameworks I tested to create Radcore, Unigui was my best choice. 4 years after Radcore was created, I am proud to have collaborated with the sale of new licenses in Brazil, as I explain to my users the importance of this and they, how it has results, licensing and/or renewing their licenses.4 points
-
PDF document generation library for server-side and client-side usage in pure JavaScript. https://pdfmake.github.io/docs/0.1/ http://pdfmake.org/playground.html4 points
-
I'd like to add: - Spend time with the family - Meditate twice a day - Go to bed with a good book, preferably fiction Any other tips?4 points
-
A release without uSesamoBase.Json (internal test) Demo Responsive2.zip4 points
-
52 years old.. used Turbo Pascal since 1991 and Delphi since 1995.3 points
-
1. UniSpeedButton.ClientEvent.LayoutConfig.Cls = customSpBtn 2. CustomCSS -> .customSpBtn.x-btn.x-btn-pressed, .customSpBtn.x-btn:hover { border-color: none; background-image: none; background-color: green; background-image: linear-gradient(yellowgreen 50%, green); }
 3 points
 -
Indeed, that's an excellent idea! I actually went ahead and converted the chm file using an online converter and have attached the PDF here for others to benefit from. uniGUI.pdf3 points
-
3 points
-
Someday, when I got my farm and retire, I'll rise two pigs and will name them: AJAX and REQUEST ! Just to see the mess they will do when I call.3 points
-
With a few code you can attach popups to any uniGUI control. But to make works exactly as Windows, you must walk a little more. Here is a simple example to attach context menu (mouse right-click) to any uniGUI control and create as you wish 'on- the-fly'. Very simple to use and customize. Features: * Tiny library. Only dependency is jQuery. * Simple API. * Looks good out of the box, with no additional tweaking. * Designed to look and behave like a standard Windows context menu. * There's so little code, it should be easy to add your own custom features. ContextMenu2uniGUI.mp4 Silver Package - 89 Projects Just $99,00 USD https://www.unigui.com.br/democetera/ This project/source-code is free to uniGUI subscriber and will be available here to download for the next few days. After that, only for sale. Link below. Don't DM me about it ! Visite http://www.unigui.com.br/ Nosso grupo no Telegram: Livros, packs de projetos, cursos, serviços, consultoria e tudo sobre unigui ! https://t.me/uniguiBrazil - Conteúdo em português ou/or See more and get this pack at http://www.unigui.com.br/democetera Our group at Telegram: https://t.me/uniguiexpress Content in English Project420-ContextMenu.rar3 points
-
Hi, I have always ask for a Combobox or Lookup with a list of display values and and corresponding values to be assigned in the field below. Now I can with dataset lookups; I need also a simple editor with a list of display values and a list of corrispondent keys. I add the request (made many times) for a well-formatted and multi-column table in the popup (with headers and separation lines). If it already exists tell me where I can find it 🙂 Good job!3 points
-
News Compatible with the latest version of uniGui 1.95.0.1575 and ExtJS 7.5.1. Delphi 2007 to Delphi 12.0 Athens UniClientEventsPropEditor.zip
 3 points
 -
Hi Abaksoft, Thanx for your PERFECT work .. i tried a lot! of things and found a solution for the Android Problem 😉 The maion problem is the "-extensions v3_req" 1. change in delphi: //A.2.2 root.pem stDays:=intToStr(365 * upYrears.Position); param:='req -x509 -days ' + stDays + ' -new -nodes -key root.key -out root.pem -config san.cnf -extensions v3_req'; ShellExecute(Application.Handle ,PChar('RunAs'),PChar(Fichier),PChar(param),PChar(Dossier),SW_HIDE); sleep(300); //A.2.3 cert.pem param:='req -x509 -nodes -days ' + stDays + ' -newkey rsa:2048 -keyout key.pem -out cert.pem -config san.cnf -extensions v3_req'; ShellExecute(Application.Handle ,PChar('RunAs'),PChar(Fichier),PChar(param),PChar(Dossier),SW_HIDE); sleep(300); 2. change in san.cnf [req] default_bits = 2048 distinguished_name = req_distinguished_name req_extensions = v3_req x509_extensions = v3_req prompt = no [req_distinguished_name] countryName = XX stateOrProvinceName = N/A localityName = N/A organizationName = Self-signed certificate commonName = Self-signed certificate [req_ext] subjectAltName = @alt_names [v3_req] subjectAltName = @alt_names basicConstraints = critical,CA:true [alt_names] IP.1 =10.0.0.10 3. Export CA in Windows - and import it as CA in Android .. Works 🙂3 points
-
JSInterface.JSConfig('cls', ['x-fa fa-sync fa-spin']); JSInterface.JSAddListener('afterrender', 'function(me){me.setStyle("color", "red"); me.setStyle("line-height", "'+ Height.ToString() +'px"); me.setStyle("font-size", "'+ Height.ToString() +'px")}');
 3 points
 -
This is an update to this example below in Chinese. I made some correction and soon I'll be providing a whole project and with English support. See other projects, examples and resources from us at https://unigui.com.br/ SourceOriginal.rar
 3 points
 -
dgAllowSelfUpdate - Normally when you edit a grid row directly, the entire row won't be refreshed until all changes in row are committed to the related dataset. Sometimes when row contains calculated fields you may want to refresh the row before all changed are committed. By enabling this option the related grid row will be refreshed each time a field is edited. This option is disabled by default. You can enable it if your dataset contains calculated fields and you want to update the row before it is committed. http://unigui.com/doc/online_help/api/uniGUITypes_TUniDBGridOption.html3 points
-
My first computers! I Still have them.
 3 points
 -
And finaly for this you can use this function + Unitimer function TDMT.Ping2(const AHost: string): Integer; var ICMP: TIdICMPClient; Started: Tdatetime; begin Result:=-1; Started := Now; ICMP := TIdICMPClient.Create(nil); try ICMP.Host := AHost; ICMP.ReceiveTimeout := 2000; ICMP.Ping(); If (ICMP.ReplyStatus.ReplyStatusType = rsEcho) Then Result:=MilliSecondsBetween(TDateTime.Now, Started); finally ICMP.Free; end; end; in timer procedure TMainForm.UniTimer1Timer(Sender: TObject); Var T : Integer; begin T:=Ping2('1.1.1.1'); if T>=0 then LPing.Caption:=T.ToString+ ' ms' Else LPing.Caption:= ' Error'; end; and for program server as @Sherzod guide me we can use this code Function UniServer(Var RetParams : Tstringlist):Integer; begin With RetParams Do Begin Add('Memory Used:'+UniServerModule.ServerResources.MemoryUsed.ToString+'/'+UniServerModule.ServerResources.PeakMemoryUsed.ToString); Add('Process Memory Used:'+UniServerModule.ServerResources.ProcessMemoryUsed.ToString+'/'+UniServerModule.ServerResources.PeakProcessMemoryUsed.ToString); Add('USER Objects:'+UniServerModule.ServerResources.USERObjects.ToString+'/'+UniServerModule.ServerResources.PeakUSERObjects.ToString); Add('GDI Objects:'+UniServerModule.ServerResources.GDIObjects.ToString+'/'+UniServerModule.ServerResources.PeakGDIObjects.ToString); Add('CPU Usage:'+FloatToStr(UniServerModule.ServerResources.CPUUsage)+'/'+FloatToStr(UniServerModule.ServerResources.PeakCPUUsage)); Add('Handles:'+UniServerModule.ServerResources.Handles.ToString+'/'+UniServerModule.ServerResources.PeakHandles.ToString); End; end;
 3 points
 -
Hi, yes is not a problem. I add my own procedure to save image to file. DrawInCanvas_Mousemove_ex.7z3 points
-
Integração com a Ntfy no Delphi. Ntfy é um serviço simples de… | by Samuel R. O. | Medium GitHub - hazzelnuts/ntfy-for-delphi: Biblioteca amigável para enviar e receber notificações instantâneas usando servidores ntfy.sh em Delphi3 points
-
wishing you all a very happy Eid2 points
-
Your 60% renewal price will be always valid. It never expires.2 points
-
Hi guys, There has been a lot of conflicting information on the forum about whether uniGui can create PWA apps and how to go about turning your app into a PWA. I have done quite a bit of work with PWA’s and I am hoping that this post will clarify the issue and provide easy-to-follow guidelines for those who are interested. To make the process easier I have selected a simple demo app that comes with uniGui and uploaded it for you after converting it to PWA. You can use the url below to see the resulting PWA on any device. https://www.qssldtf.com:8086 The answer to whether uniGui is PWA capable depends very much on what aspect of PWA you are looking for. Clearly there is no doubt that any uniGui app can be made installable on all devices that support PWA technology. This includes all mobile devices as well as desktops running Chrome or MS Edge. Firefox & Opera support aspects of PWA but do not allow installation. And simply making your app installable makes such a massive a difference to ease of use (no browser, faster launch, full-screen, smooth navigation etc.) that there should be no excuse why you would not want to do it. How easily this can be done depends on the deployment option you have chosen. More to this below. The other aspects of PWA (offline operation, push notification & access to device resources) are, in my opinion, only achievable with uniGui if you build your UI with HTML and JavaScript because otherwise Ext JS puts too many stumbling blocks in the way. There are 3 basic requirements to making your app a PWA: The site must be accessed via HTTPS with a valid SSL certificate. The site must have a valid web Manifest You must supply and register a Service Worker HTTPS requirements PWA sites will only work over a secure connection with a valid SSL. However, for development purposes Google Chrome allows you to bypass this requirement when working over localhost so you can easily debug and install the PWA on your development device. This feature is not a default setting in Chrome. You need to enable it via chrome://flags as explained here Options for testing service workers via HTTP. Web Manifest The web manifest is a text file that contains a single JSON object whose fields map out the essential settings of your PWA site. By convention the manifest usually has the filename manifest.json or manifest.webmanifest and must reside in the root folder of your app. It contains all the information needed to tell the browser how the PWA will look when it is installed on the target device and configures how it will behave when it is launched. The manifest must also point to a list of icons of varying sizes to be used on splash-screens of devices you are targeting. There is a wealth of information about the web manifest online so I won’t say anymore here, except to mention that this is where there is a stumbling block with uniGui, unless you are deploying via ISAPI. As many developers have discovered, it is impossible to import the manifest if your app is running in standalone mode, with or without hyper-server. You will consistently get the dreaded “401 (unauthorised)” error. However I managed to come up with a means to sneak the manifest in through the back-door and I will share that below. Service Worker The Service Worker is a piece of JavaScript code that runs in its own thread in the browser background and intercepts and routes all the communication between the client side of your app and both the server and the rest of the world. You have tools to interrogate and manipulate this communication at will with JavaScript. You can immediately see how things like “working offline” and “push notifications” evolve from this. Every PWA running in the browser must register its own service worker. By convention the service worker has a filename like sw.js and usually reside in the root folder of your app. Depending on the desired functionality the service worker can be very complex or a simple stub that just relays messages without any interrogation. The service worker included in the demo project I have uploaded with this post is of the latter type and you can safely use it in all your apps. However, every service worker must have a unique “cache-name” so you need to edit the file and change the embedded cache-name to something that matches your app-name. What is with Safari At the point of this writing Safari does not yet support the web manifest. When you run you PWA on any Safari device the manifest is completely ignored. Instead, in order to get a PWA to work Safari requires that you insert some essential meta tags into the header of your html. It so happens that this anomaly with Safari makes it much easier to convert a uniGui app installable on Apple devices. Just give the app the little stub of service worker discussed above and add a tiny bit of JavaScript into the ServerModule.CustomCSS to activate it then add the following meta tags and into the ServerModule.CustomMeta and you have a working PWA for all Safari Devices. Gone is the “401 (unauthorised)” nightmare. <meta name="apple-mobile-web-app-capable" content="yes"> <meta name="apple-mobile-web-app-status-bar-style" content="black"> <meta name="apple-mobile-web-title" content="Video Demo"> <meta name="apple-touch-icon" href="/files/icons/i144x144.png" sizes="144x144"> <meta name="apple-touch-icon" href="files/icons/i192x192.png" sizes="192x192"/> <meta name="apple-touch-icon" href="files/icons/i152x152.png" sizes="152x152"/> I continue to see recent articles online that tell you that in order to get your PWA to also work on Safari you have to insert these meta tags into your app. This is old news guys. This Safari issue was made redundant in April 2020 when Google introduced PWACompat. This utility will look at your web manifest and automatically adjust the html of your app to satisfy Safari (and other legacy browsers). We’ll see how to use it below. So how do you go about converting you uniGui to PWA The components and bit of code you need are included in the project I have supplied so I suggest you start by downloading and compiling the project to get to grip with how things work. The project is very simple and should compile without any issues. Note that I have configured the project to store the resulting exe and dcu’s in their own folders because I prefer to keep the source folder uncluttered. After compiling, run the app by double-clicking on the resulting exe then use Chrome to access http://localhost:8077. Don’t forget to configure Chrome to bypass HTTPS requirements as stated above beforehand. Once the site has opened I suggest you activate Chrome’s dev-tools (F12 key) and switch to the “application” tab. There you can see that both the service worker and manifest have installed successfully and all the icons will be shown. You should now also see an install button in the toolbar. Depending your version of Chrome, you might have to close and restart the site if you don’t see the install button. Go ahead and run the install, it is very easy to uninstall later. The PWA should install immediately and switch over to a full-screen standalone application and the app icon should appear on your desktop. By the way, the easiest way to uninstall a PWA is to go to chrome://apps. All installed PWA’s will be shown and you can right-click to select the uninstall option. It might interest you to know that the PWA will also be registered as a valid Windows application in the Registry. So you can uninstall it by going to “Control Panel -> Programs & Features”. Lets’ analyse the PWA components in the demo project In the root folder of the executable you can see the following required files: manifest.json sw.js (Service Worker) We also have a list of splash-screen icons stored in the folder files/icons. That is in general all you need from a components point of view. In theory all you then need to do now is to import the manifest and register the service worker when the project starts up. Importing the manifest You do this by inserting this into ServerModule.CustomMeta: <link rel="manifest" href="/manifest.json"> Registering the Service Worker This is done with the bit of JavaScript shown below. You insert this into ServerModule.CustomCSS. As you can see, it is good practice to first check whether the host browser supports service workers before attempting to register. In the script I have supplied with the demo project I have inserted some logging (console.log) to show weather or not registration has succeeded. You can see the results in the “console” page of the dev-tools. You need to comment the log statements out before publishing your PWA app. </style> <script> if ('serviceWorker' in navigator) { navigator.serviceWorker.register('/sw.js') } </script> <style> If you are deploying through ISAPI that is all you need to do. The site will work as a PWA in Android and Chrome. But not Safari. In order for Safari to work you need bring in the PWACompact utility discussed above. You do this by adding the pwacompat link in the ServerModule.CustomMeta entry, before the manifest link. So the CustomMeta entry will look like this (note I included the favicon injection that we all do): <link rel="icon" type="image/png" href="files/icons/i192x192.png" sizes="192x192"/> <meta name="apple-mobile-web-app-capable" content="yes"> <script async src="https://cdn.jsdelivr.net/npm/pwacompat" crossorigin="anonymous"></script> <link rel="SHORTCUT ICON" href="/favicon.ico"> <link rel="manifest" href="/manifest.json"> Briefly, the PWACompat utility will analyse your manifest and insert additional meta links to satisfy Safari. You will them have a PWA that will work in all PWA compatible browsers. But, as things stand, this will only work when deployed through ISAPI. If you are running in standalone mode the “manifest” link will fail with a “401 (unauthorized)” error and PWACompat will fail because it does not have a manifest to work with. To fix this issue I borrowed an idea from here How to Setup Your Web App Manifest Dynamically Using Javascript and adjusted it to overcome some ExtJS quirks. The trick here is to remove href="/manifest.json" from the manifest link in the CustomMeta script and replace it with a placeholder id that we can use later to inject a dynamic manifest. The manifest meta link now looks like this: <link rel="manifest" id="manifest_link"> What I did for standalone deployment is to read the manifest in Delphi and generate some JavaScript that will be injected into the starting html. The resulting JavaScript must be inserted into the “Script” field of the form that activates first. If your application uses a Login form the script should will be inserted the LoginForm is activated, otherwise it has to be inserted into the MainForm. The project demo I have supplied does not have a Login form so the script is inserted as follows in the Main form: procedure TUniLoginForm1.UniLoginFormCreate(Sender: TObject); var sManifest : String; begin sManifest := UniMainModule.GetDynamicManifest; if sManifest > '' then Self.Script.Text := sManifest; end; As the code indicates I have placed the required JavaScript generation code in the MainModule for ease of use. The UniModule.GetDynamicManifest function converts the contents of the manifest.json file into a JavaScript object and add the necessary java code that will modify the manifest link we added via CustomMeta (<link rel="manifest" id="manifest_link">) and insert an “href” that points to the new manifest object. You will notice when you look at the manifest generation function that it first checks the manifest.json to make sure that it contains all the essential fields. I discovered by accident that Delphi’s JSON handling does not have decent exception handling and there is no way of avoiding a crash if you try to reference a field that does not exist. If your manifest.json does not conform you will get an empty JavaScript back and the PWA won’t work. In case you want to see the resulting JavaScript I have added some code in the function to save it in the folder Config off the root folder. You just need to un-comment it. Additionally, it is a habit of mine to use the ini file concept to configure my applications. This is what I have done regarding the CustomMeta and CustomCSS scripts. I store the changes I need in an external text file and import it at start-up. For this project I have stored the data in the folder “Config" within the root folder. This is the code I use to populate the ServerModule: procedure TUniServerModule.UniGUIServerModuleCreate(Sender: TObject); var sData, cfgFolder, cfgFile : String; begin cfgFolder := ServerRoot+'config\'; //Import service worker registration cfgFile := cfgFolder + 'script.cfg'; if FileExists(cfgFile) then with TStringList.Create do try LoadFromFile(cfgFile); sData := Text; if sData > '' then CustomCSS.Text := sData; finally free; end; //Import manifest meta links cfgFile := cfgFolder + 'meta.cfg'; if FileExists(cfgFile) then with TStringList.Create do try LoadFromFile(cfgFile); sData := Text; if sData > '' then CustomMeta.Text := sData; finally free; end; end; To summarise, these are the steps you need to do to convert an existing uniGui app to PWA: Create a web manifest.json and place it in the root folder of your executable. I suggest you initially copy my manifest and change the “name”, “short_name” and start_url to fit your project. For standalone deployment the start_url should point to the project executable if you are not using the hyper-server, otherwise it should point to hyper_server.exe. For ISAPI it should point at the hyper-server dll, whatever you have called it. 2 quick tips here: The “name” in the manifest is used on the splash screen of mobiles and the caption of the MainForm when running on desktops. However what you have entered in the “name” field will be concatenated with whatever you have in the “Title” field of the ServerModule. So remember to blank the ServerModule’s Title field. FYI the “short_name” will be used on the home-screen icon of mobiles and shortcut icon of desktops, but only if the “name” is too long (I think >40 chars). There are numerous online tools to help you create your icons. I use https://manifest-gen.netlify.app. You just need to upload a 512x512 image and it will generate all the icons you require. Copy my sw.js into the executable root folder. Copy the contents of my files/config folder into the files folder of your executable. Copy the CustomMeta & CustomCSS importing code from my project into your ServerModule. If you are using standalone deployment copy the dynamic manifest generation function from my project into your MainModule and insert the scrip-handling calls in your LoginForm or MainForm. Something to be aware of regarding installing you PWA’s on your test device: Chrome uses the URL as a unique identifier for each PWA. So once you have installed an app running on https://localhost:8077 you won’t be able to install another app running on the same port. So you have to either un-install the previous one or use a different port. That’s it guys. I hope this post generates a bit of renewed enthusiasm. PWA-VideoDemo.zip2 points
-
Good afternoon, the reason it doesn't work is that it requires on mobile https example https://192.168.1.xxx:80772 points
-
Finally ..My code completed. function beforeInit(sender, config) { config.listeners = { keyup: function(textarea) { var inputEl = textarea.inputElement; textHeight = inputEl.dom.scrollHeight; if (textarea.getValue() == '') { textHeight=35; } if (textHeight != textarea.getHeight()) { var H1 = textHeight; var H2 = textarea.getHeight(); if (H1<=35*4) { textarea.setHeight(textHeight); } ajaxRequest(sender,'_resize',{newH: H1, oldH: H2}); } } } }2 points
-
Thank you very much for your interest. And your continuous interaction. Great product. And wonderful support.2 points
-
Obrigado @picyka e @Marlon Nardi!2 points
-
All post that are irrelevant to this topic have been deleted. Please stay on topic. Cheers2 points
-
Towards the end of the year, I remember this post ❄️ 🙂2 points
-
Thanks for the feedback 🤝. It is already being resolved by email suporte@falconsistemas.com.br2 points
-
"Left": "Right":
 2 points
 -
Attached is an example, in MainForm.script you may have: function myFunction() { var num = 2 + 3; ajaxRequest(MainForm.form, ['callback'], { res: num} ); } And in MainForm: procedure TMainForm.UniButton1Click(Sender: TObject); begin uniSession.addJS('myFunction()'); end; procedure TMainForm.UniFormAjaxEvent(Sender: TComponent; EventName: string; Params: TUniStrings); begin if sameText(eventname,'callback') then begin showMessage('Result: '+Params.Values['res']); end; end; ajaxtest.zip2 points
-
procedure TMainForm.UniFormCreate(Sender: TObject); begin with UniImage1 do begin //JSInterface.JSConfig('cls', ['x-fa fa-heart']); // or JSInterface.JSConfig('cls', [UniNativeImageList1.GetImageIconCls(1)]); // color optional // the remaining two properties must be specified JSInterface.JSAddListener('afterrender', 'function(me){me.setStyle("color", "red"); me.setStyle("line-height", "'+ Height.ToString() +'px"); me.setStyle("font-size", "'+ Height.ToString() +'px")}'); end; end;2 points
-
This problem - is not a problem. This happens because I did not clear params of my connection. Having a blank setup page like this. is not the same as - "there are no params"! I made the error of reusing an earlier FDConnection component ... and that cost me some hours of debugging 😕 And that will give the error - that the connection cannot be pooled. Thanks all for your help in trying to help me along. And I hope this information can help others as well.
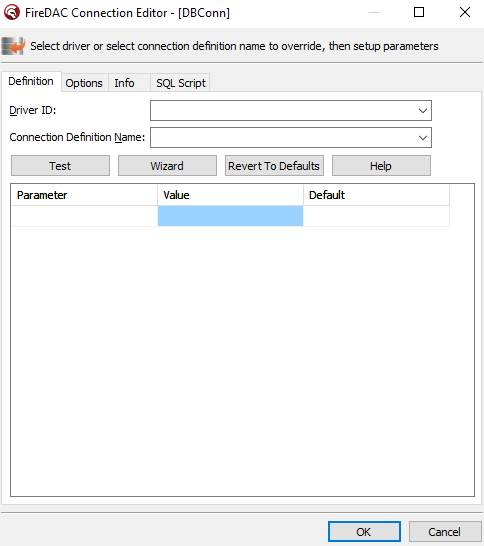
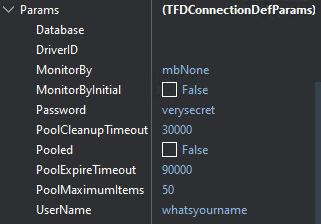 2 points
 -
В UniServerModule Вы можете вызвать: UniServerInstance.TerminateStandAlone();2 points
-
cutting out extjs from unigui is impossible basically unigui is 'just' a wrapper for sencha most probably because sencha is the most similiar to vcl from what is available currently) i'm reading again and again about unigui being a problem regarding pwa and responsive design this is in fact utterly false the app i'm developing is using the desktop-line of controls, because the mobile one is lackluster except for the mainform, everything is "alignment client" and "layout auto" basically i do not use the layouting from sencha nor the server alignment for desktop all new forms are parented into the mainform everything in my app is using css flex for layouting i do NOT have any changes done to unigui (currently requesting a change for some code, so lookup-combobox i developed will work) my app is pwa (but without an offline mode, which is basically possible even with unigui, but heavy work/code needed) for that i developed a big css file and using a self-written wizard to apply css classes to the layout.cls property its impossible to design a layout that is equally 'good' on a portrait 400*1000 and a landscape 1000*800 and a Desktop monitor 2500*1600 but every single Module/Form does actually responsively scale in my App Its just that someone has to invest quite abit of work to get things done but this is true for every framework unigui has the beauty, that someone is able to use his existing bussiness logic in delphi code (which is huge advantage) sure, there is alot to be wanted left from unigui, lots of just very basic implementations BUT, the longer i develop with it and the more i delve into it and extjs, the more i see the work that was done making something better is a very very big task, i heavily doubt that its done in near future by anyone2 points
-
Thank you very much Sherzod. I already implemented the code that you suggested in the link. I add the example project in case it helps someone else. Kind regards. ejemplo.zip2 points
-
uniGUI - v1.90.0.1568 jQuery upgraded to 3.6.4.2 points
-
Yes it is possible Solution : 1. Edit the host file : c:\windows\system32\driver\ets\host 2. Add this line for example: 192.168.1.11 mysite.com save it (192.168.1.11 is your local server) 3. Do the same on all your PC local machines. 4. Create on your server a p12 Certificate for mysite.com (as described above step3 + 4) powershell > mkcert -pkcs12 mysite.com 5. Install it on both : your server and client PC 6. Run your app from all local pc : https://mysite.com is secure ____ PS: don't ask me for mobile device (android). I don't know...2 points
-
Last update, with one more class to internalize variables, for cleaner code. It seems like p5 works pretty well with Unigui. Movable polygons with movable vertices. Edit: Using literal object for polygons, for a bit more efficient code. Edit 2: Added function for deleting selected polygon. Edit 3: Added function for inserting and deleting vertices. JS code: <div id='cnvCont'></div> <script type="text/javascript"> new p5(); let bgImg; let imgLoaded = false; const px = 8; const minimumVx = 3; const vxFillCol = 'white'; const selVxCol = 'red'; const vxCol = 'rgb(0,0,0)'; const hoverPolyCol = 'green'; const drawPolyCol = 'red'; const polyCol = 'blue'; const selPolyCol = 'black'; const polyStrokeW = 2; let Vertex = function(ix, iy) { this.x = ix; this.y = iy; this.drawVx = function(selected) { if (selected) { stroke(selVxCol); strokeWeight(2); } else { stroke(vxCol); strokeWeight(1); } fill(vxFillCol); rect(this.x-round(px/2), this.y-round(px/2), px); }; this.move = function(dX, dY) { this.x += dX; this.y += dY; }; this.hit = function(mX, mY) { return (collidePointRect(mX, mY, this.x-px, this.y-px, px*2, px*2)); }; }; class Polygon { constructor(x, y) { this.isSelected = false; this.closed = false; this.hover = false; this.moveLock = false; this.vxhover = false; this.vxMoveLock = false; this.vxi = -1; this.vx = []; this.vx.push(new Vertex(x,y)); } addVx(x,y) { this.vx.push(new Vertex(x,y)); } doClose() { this.closed = true; this.isSelected = true; } move(dX, dY) { this.vx.forEach( v => { v.x += dX; v.y += dY; }); } drawPoly(len, mX, mY) { if (this.hover) { cursor(MOVE); stroke(hoverPolyCol); } else if (!this.closed) stroke(drawPolyCol); else stroke(polyCol); if (this.isSelected) stroke(selPolyCol); strokeWeight(polyStrokeW); noFill(); if (len>1) this.vx.slice(0, len-1).forEach( (vx, i) => { line(vx.x, vx.y, this.vx[i+1].x, this.vx[i+1].y); }); let lastVx = this.vx[len-1], startVx = this.vx[0]; (!this.closed) ? line(lastVx.x, lastVx.y, mX, mY) : line(lastVx.x, lastVx.y, startVx.x, startVx.y); } displayVx(len, mX, mY) { this.vxhover = false; this.vx.forEach((v, i) => { v.drawVx(i===this.vxi); if (!this.vxMoveLock) if (v.hit(mX, mY)) { this.vxi = i; this.vxhover = true; } }); } moveVx(dX, dY) { if (!this.moveLock && (this.vxhover || this.vxMoveLock)) { cursor(HAND); if (mouseIsPressed) { this.vxMoveLock = true; this.vx[this.vxi].move(dX, dY); } else this.vxMoveLock = false; } else this.vxhover = false; } movePoly(dX, dY) { if (!this.vxMoveLock && (!this.vxhover) && (this.hover || this.moveLock)) { if (mouseIsPressed) { this.moveLock = true; this.move(dX, dY); this.vxi = -1; this.vxhover = false; } else this.moveLock = false; } } delVx() { if (this.vxi < 0) return; this.vx.splice(this.vxi, 1); this.vxMoveLock = false; } insertVx() { if (this.vxi < 0) return; let vxn = this.vxi - 1; if (vxn < 0) vxn = this.vx.length - 1; let ix = (round(this.vx[this.vxi].x + this.vx[vxn].x)/2); let iy = (round(this.vx[this.vxi].y + this.vx[vxn].y)/2); this.vx.splice(this.vxi, -1, new Vertex(ix,iy)); } duplicate() { if (this.vxi < 0) return; let vi = this.vx[this.vxi]; return this.vx.some( (vx, i) => { return (((abs(vx.x-vi.x))<10) && ((abs(vx.y-vi.y))<10) && (i!=this.vxi)); }); } display(mX, mY, dX, dY) { this.hover = (collidePointPoly(mX, mY, this.vx) && (!polys.vxMoveLocked()) && (!(polys.moveLocked() && !this.isSelected)) && (!polys.drawing())); let len = this.vx.length; this.drawPoly(len, mX, mY); if (this.isSelected) { this.displayVx(len, mX, mY); this.movePoly(dX, dY); this.moveVx(dX, dY); } } } let polys = { started: false, closed: false, pArray: [], selIndex: -1, count: 0, ready: function() { return (!this.started); }, drawing: function() { return ((this.started)&&(!this.closed)); }, moveLocked: function() { return this.pArray.some( poly => { return (poly.moveLock===true); }); }, vxMoveLocked: function() { return this.pArray.some( poly => { return (poly.vxMoveLock===true); }); }, clear: function() { this.started = false; this.closed = false; this.pArray = []; this.selIndex = -1; this.count = 0; }, newPoly: function(mX, mY) { if ((mX<0) || (mY<0) || (mX>bgImg.width) || (mY>bgImg.height)) return; this.clearSelected(); this.pArray.push(new Polygon(mX, mY)); this.started = true; this.closed = false; this.count = this.pArray.length; this.selIndex = this.count - 1; }, addVx: function(mX, mY) { if ((mX<0) || (mY<0) || (mX>bgImg.width) || (mY>bgImg.height)) return; if (this.pArray.every( (poly, i) => { return (poly.hover && (i!=this.selIndex)); })) return; this.selected().addVx(mX,mY); }, canClose: function(mX, mY) { return ((Math.abs(mX-this.getX())<10) && (Math.abs(mY-this.getY())<10)); }, doClose: function() { this.selected().doClose(); this.started = false; this.closed = true; }, delSelected: function() { if (this.selIndex < 0) return false; if (this.started) { this.pArray.pop(); this.started = false; } else this.pArray.splice(this.selIndex, 1); this.count = this.pArray.length; this.selIndex = -1; return true; }, clearSelected: function() { this.pArray.forEach( poly => { poly.isSelected = false; }); this.selIndex = -1; }, doSelect: function() { return this.pArray.some( (poly, i) => { if (poly.hover || poly.vxhover) { this.clearSelected(); this.selIndex = i; poly.isSelected = true; return true; } }); }, selected: function() { if (polys.selIndex>-1) return this.pArray[this.selIndex]; }, isSelected: function() { return (polys.selIndex>-1); }, isEmpty: function() { return (this.count===0); }, isClosed: function() { return (this.closed); }, vxLen: function() { return this.selected().vx.length; }, getVx: function() { return this.selected().vx; }, getX: function() { return this.selected().vx[0].x; }, getY: function() { return this.selected().vx[0].y; }, dupCheck: function() { if ((this.count>0) && (this.selIndex>-1)) return this.selected().duplicate(); }, delVxDup: function() { if ((this.vxLen() > minimumVx) && (this.dupCheck())) this.selected().delVx(); }, delVx: function() { if (this.vxLen() > minimumVx) this.selected().delVx(); }, hover: function() { this.pArray.forEach( poly => { if (poly.hover) return true; }); }, insertVx: function() { this.selected().insertVx(); }, display: function(mX, mY, dX, dY) { if (this.isEmpty()) return; cursor(ARROW); this.pArray.forEach( poly => { poly.display(mX, mY, dX, dY); }); } } function setup() { loadImage('files/city.jpg', regImg); } function regImg(img) { bgImg = img; let cnv = createCanvas(bgImg.width,bgImg.height); cnv.parent('cnvCont'); imgLoaded = true; } function draw() { if (imgLoaded) background(bgImg); polys.display(mouseX, mouseY, mouseX-pmouseX, mouseY-pmouseY); } function pushData() { ajaxRequest(MainForm.HTMLFrame, ['getCoords'], { data : JSON.stringify(polys.getVx()) }); } function mousePressed() { if (polys.doSelect()) return else if (polys.ready()) polys.newPoly(mouseX, mouseY); else if (polys.drawing()) { if (polys.canClose(mouseX, mouseY)) { polys.doClose(); pushData(); } else polys.addVx(mouseX, mouseY); } } function mouseReleased() { if (!polys.isClosed()) return; polys.delVxDup(); } function doubleClicked() { if (polys.isEmpty()) return; if (polys.isSelected()) polys.insertVx(); } function keyPressed() { if (polys.isEmpty()) return; if ((key = ESCAPE) && (polys.vxLen() > (minimumVx - 1))) { polys.doClose(); pushData(); } else if ((key = ESCAPE) && (polys.vxLen() <= (minimumVx - 1)) && polys.drawing()) polys.delSelected(); } function delVertex() { if (polys.isEmpty()) return; if (!polys.isClosed()) return; polys.delVx(); } function insertVertex() { if (polys.isEmpty()) return; if (polys.isSelected()) polys.insertVx(); } function delSelected() { if (polys.isEmpty()) { ajaxRequest(MainForm.HTMLFrame, ['delete'], { status : 'no polygons to delete' }); return; } if (polys.delSelected()) ajaxRequest(MainForm.HTMLFrame, ['delete'], { status : 'polygon deleted ok' }); else ajaxRequest(MainForm.HTMLFrame, ['delete'], { status : 'no polygon selected' }); } function resetCnv() { polys.clear(); } </script> Testprog.zip2 points
-
Dear Friends, Here is in attachment a good way to memorize centering text on touch Mobile. Enjoy... Mobile_Lecons.7z2 points